Android on iPhone, Step-by-Step
The first steps collect the multitouch and WLAN firmware for the iPhone. We cannot legally redistribute these binary blobs, so it is necessary for you to extract them from the .ipsw file and Marvell's Website.
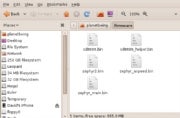
1. On the Linux machine, create a folder named firmware in your home directory.
2. Extract SD-8686-FEDORA26FC6-SYSKT-GPL-9.70.3.p24-26409.P45.tar from SD-8686-LINUX26-SYSKT-9.70.3.p24-26409.P45-GPL.zip to a temporary folder.
3. Extract FwImage/helper_sd.bin and FwImage/sd8686.bin from SD-8686-FEDORA26FC6-SYSKT-GPL-9.70.3.p24-26409.P45.tar and put them inside your 'firmware' folder.
4. Rename helper_sd.bin to sd8686_helper.bin.
You have your WLAN firmware at this point. Now for the multitouch firmware.
5. On the Linux machine, create a folder named idroid in your home directory and extract utils/dripwn from the prebuilt tarball (.tar archive) you downloaded into it.
6. Copy or move the 3.1.2 .ipsw file you obtained from Apple's Website into the same 'idroid' folder as dripwn.
7. Start a command-line shell (Terminal under Ubuntu) and navigate to the 'idroid' folder you created. You can type cd ~/idroid to do this.
8. Go to this page if you have an iPhone 3G or this page if you have an older iPhone. Copy the VFDecrypt key.
9. In the shell you started earlier, if you have a first-generation iPhone, type the following:
./dripwn iPhone1,1_3.1.2_7D11_Restore.ipsw [the VFDecrypt key you copied]
If you have a iPhone 3G, type the following:
./dripwn iPhone1,2_3.1.2_7D11_Restore.ipsw [the VFDecrypt key you copied]
10. After a while, the command will finish and you will have zephyr_main.bin, zephyr_aspeed.bin, and zephyr2.bin in your 'idroid' folder. Move these files into the 'firmware' folder.
You now have all the files needed for Android, and you can begin installing it.
11. If you haven't already, install the OpenSSH tool on your iPhone viaCydia.
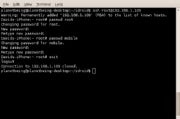
12. If you just installed OpenSSH, connect to your iPhone via SSH, log in as root with the password alpine, and type passwd root to change the password for root. Then, enter passwd mobile to change the password for the mobile user.
Don't skip this step. All of the iPhone worms out there affect you only if you haven't changed the SSH password from the default.
13. Extract prebuilt/android.img.gz, prebuilt/cache.img, prebuilt/ramdisk.img, prebuilt/system.img, prebuilt/userdata.img, and zImage from the prebuilt tarball.
14. Use the 'scp' command or an SFTP client to upload all of these files into the /private/var folder on the iPhone.
You can use these commands on Linux, if you wish to use scp instead of an SFTP graphical-interface client. Assuming you're in the same folder as the files, enter:
scp android.img.gz root@[ip address of iPhone]:/private/var/
scp cache.img root@[ip address of iPhone]:/private/var/
scp ramdisk.img root@[ip address of iPhone]:/private/var/
scp system.img root@[ip address of iPhone]:/private/var/
scp userdata.img root@[ip address of iPhone]:/private/var/
scp zImage root@[ip address of iPhone]:/private/var/
15. Using the SFTP client or scp, create a folder called firmware in the /private/var folder on the iPhone; afterward, upload all the files from the 'firmware' folder you created earlier to it.
If the 'firmware' folder you created earlier is inside your home directory, you can use the following command:
scp -r ~/firmware/ root@[ip address of iPhone]:/private/var/firmware


0 comments:
Post a Comment