Android on iPhone, Continued
16. Reboot your iPhone. As a safety precaution, check to make sure that the files are still present after the reboot and that they all have the right sizes. An incorrect file size is one that does not exactly match the source file size (for example, system.img is not 71327744 bytes, android.img.gz is not 2161556 bytes, or zImage is not 2364280 bytes on the 3G or not 2356044 bytes on the older iPhone).
Many people have trouble with this process because not all of the files reached their iPhone in one piece.
17. Extract utils/oibc, utils/loadibec, and prebuilt/openiboot.img3 from the prebuilt tarball into your 'idroid' folder.
18. Shut down the iPhone and place it into Recovery Mode: With the iPhone powered off and plugged into the computer via USB, push Hold and Home simultaneously, and then let go of Hold after the backlight turns on. Continue holding Home until the 'Connect to iTunes' image appears on the screen.
19. Run the following commands in Terminal (you'll need to install libusb-0.1-4 with Synaptics or 'apt-get' if you haven't already):
cd ~/idroid
sudo ./loadibec openiboot.img3
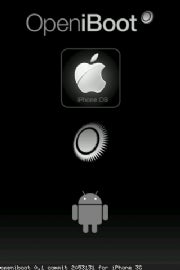
If all goes well, the 'openiboot' boot menu should now appear!
20. Use either the volume-control buttons or the Hold button to select the second menu option, Console. Tap the Home button to launch it.
A text-mode console should start running on your screen, ending with a 'Welcome to openiboot' message.
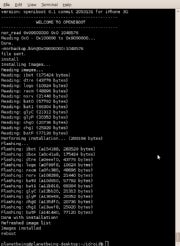
21. Type sudo ./oibc in Terminal.
The same messages that appeared on the iPhone screen should now appear in Terminal. You should next make a backup of the NOR (the device on which the iPhone's bootloader is stored) in case something goes wrong, so you don't brick your iPhone.
22. Type nor_read 0x09000000 0x0 1048576 in Terminal/oibc. This will read the entire NOR into main memory.
23. Type ~norbackup.bin@0x09000000:1048576 in Terminal/oibc. A file will appear in the 'idroid' folder called norbackup.bin. Keep this somewhere safe.
The command uploads the NOR to the computer. After you make this backup, you are now free to modify the NOR. The next step installs OpeniBoot onto the NOR, supplanting the existing Apple iBoot bootloader.
24. Type install in Terminal/oibc.
This process may take a few minutes. Wait until the installation-complete message appears.
25. Type reboot in Terminal/oibc and then exit out of it by pressing Ctrl-C.
The OpeniBoot menu should now come up whenever you boot your iPhone. Note that you can uninstall OpeniBoot from oibc with the 'uninstall' command. Type help for a list of all OpeniBoot commands.
You can still get into the iPhone OS's recovery mode by holding down Home on the iPhone OS option in the menu until the 'Connect to iTunes' image appears (instead of just tapping Home).
You should be finished! Use the OpeniBoot menu to boot Android by selecting that OS from the menu whenever you wish. Unfortunately, no good method to shut down Android exists yet, so the only way to turn it off is to hold down the Hold and Home buttons until you've forced the phone off.
Check out iDroidWiki for more tutorials and tips on what you can do with your new Android iPhone.
David Wang is a hobbyist hacker better known as "planetbeing." For the latest developments, visit his blog, Linux on the iPhone.
Via { here }


0 comments:
Post a Comment